(Mttindi area, Samaki V.
on right) (72K)
Valley (62K)
(69K)
Rivers (56K)
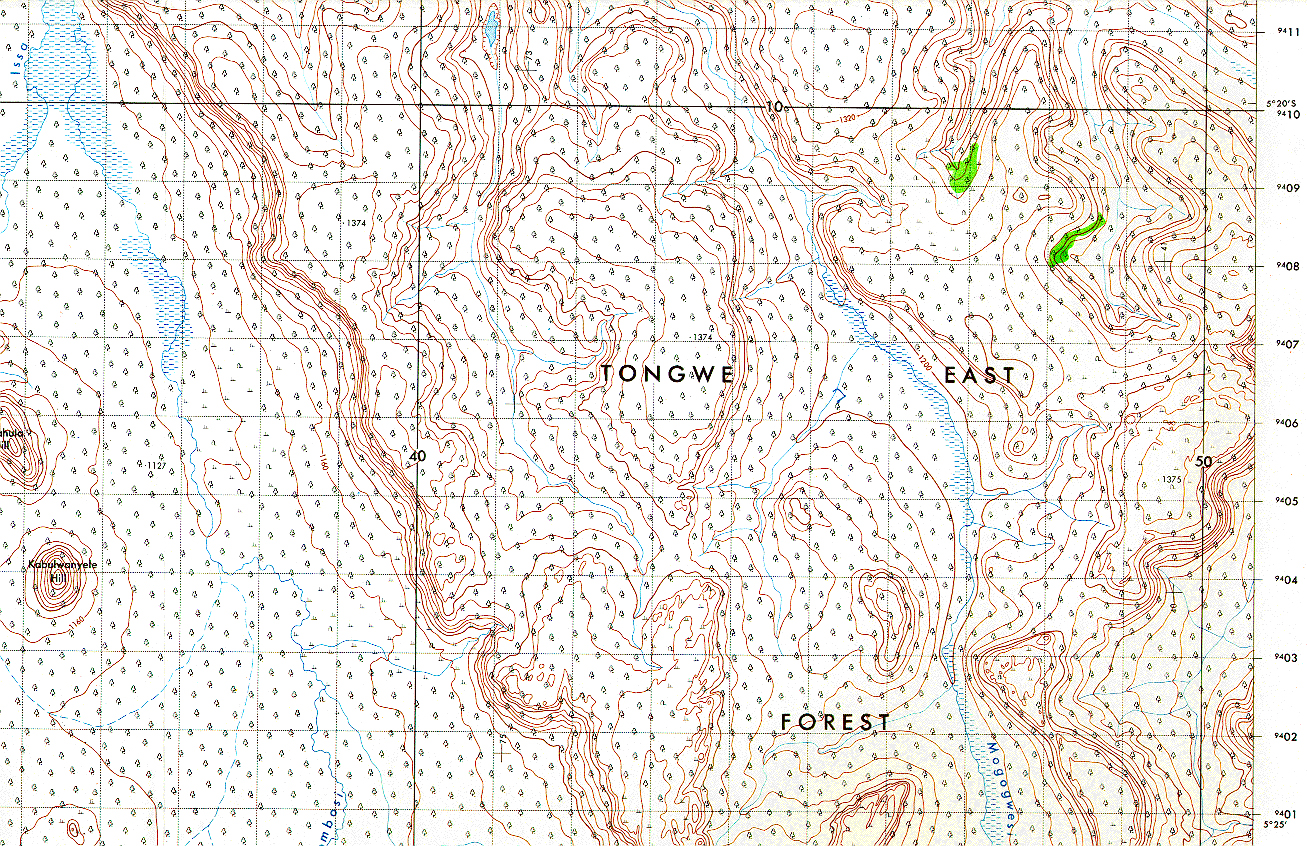
The following page contains two groups of aerial photos. One group consists of aerial oblique color photos, taken by Jim Moore in 1992. The other group consists of black and white vertical mapping photos, taken professionally in 1974. These are the photos used in creating topographic maps.
The photos on this page are linked to larger sized copies - the size of the file is in parenthesis. The mapping photos were scanned at high resolution and files are large.
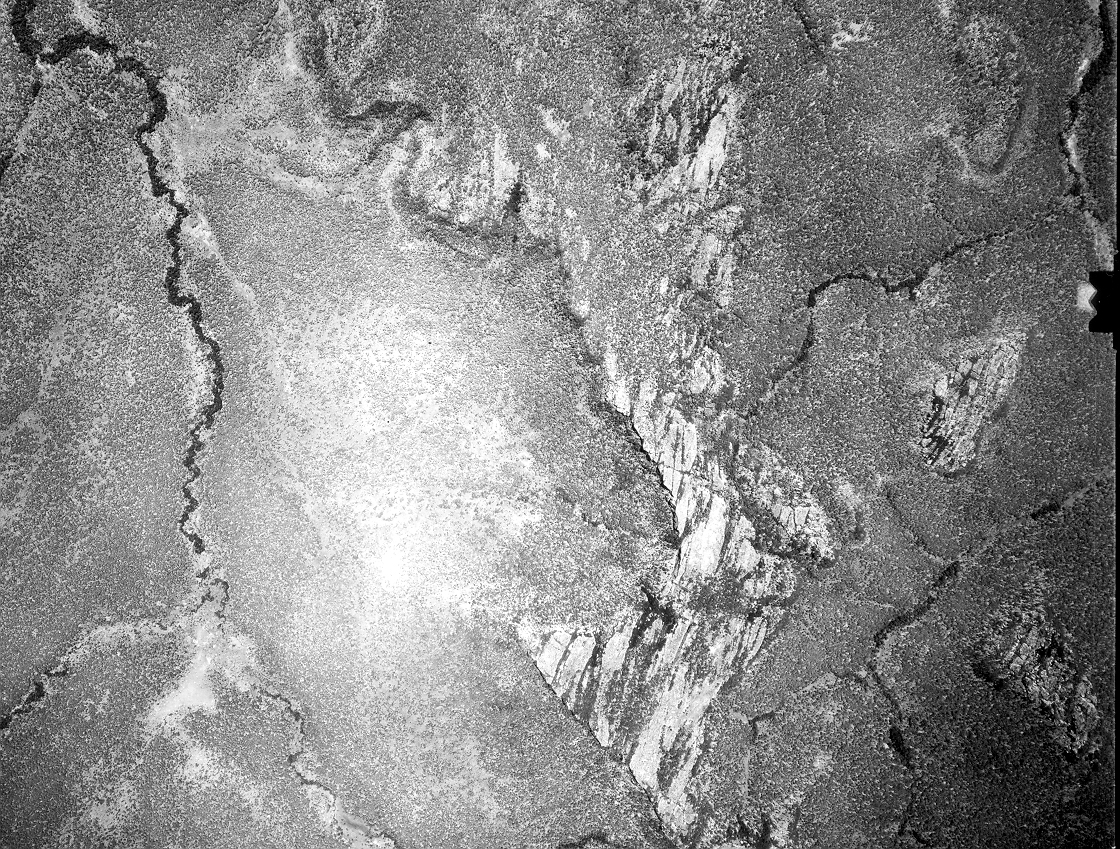
The vertical photos are taken with a wide-angle lens, which introduces considerable peripheral distortion; only the exact frame center is free of such distortion (on some frames this is marked by a faint gray cross). It is this distortion that enables mappers to reconstruct accurate 3-dimensional images out of pairs of overlapping photographs. PLEASE NOTE: I have tried to limit the images here to the middle region of the original photographs, to minimize peripheral distortion; the true (undistorted) center of the photograph is contained in each image, but often is not at the geometric center of the image (for a variety of reasons). As luck would have it, few of the Ugalla study areas happened to be on the center of the mapping flight paths, so the Mttindi photos especially are distorted. Thus these are not designed to be used as stereopairs for mapping. To include the entire original photos at fine grain would result in files in the 5MB range. Contact me if you would be interested in access to the original photographs (prints made in Dar from the original negatives).
Click to view larger image files
|
|
|
|
| Ugalla Dry Season (Mttindi area, Samaki V. on right) (72K) |
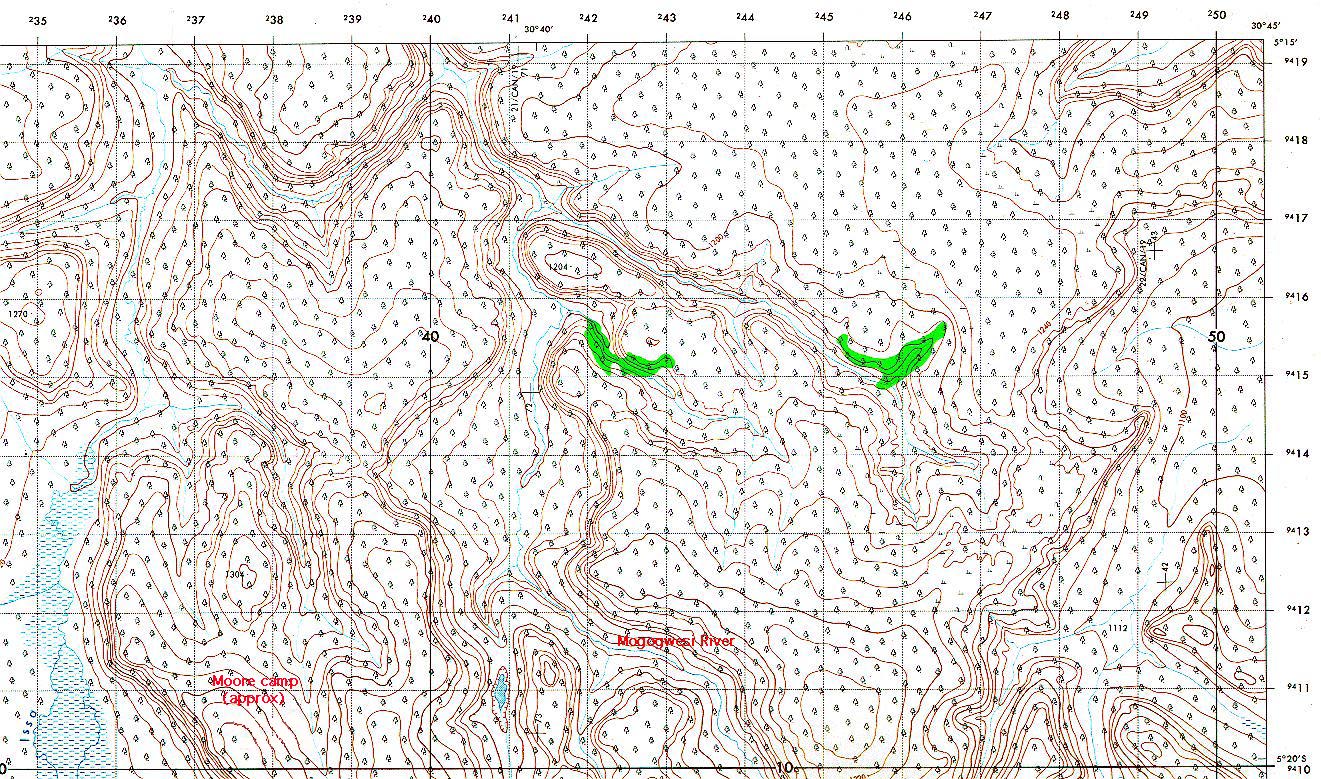
Mogogwesi River Valley (62K) |
Nguya River (69K) |
Issa & Mufombosi Rivers (56K) |
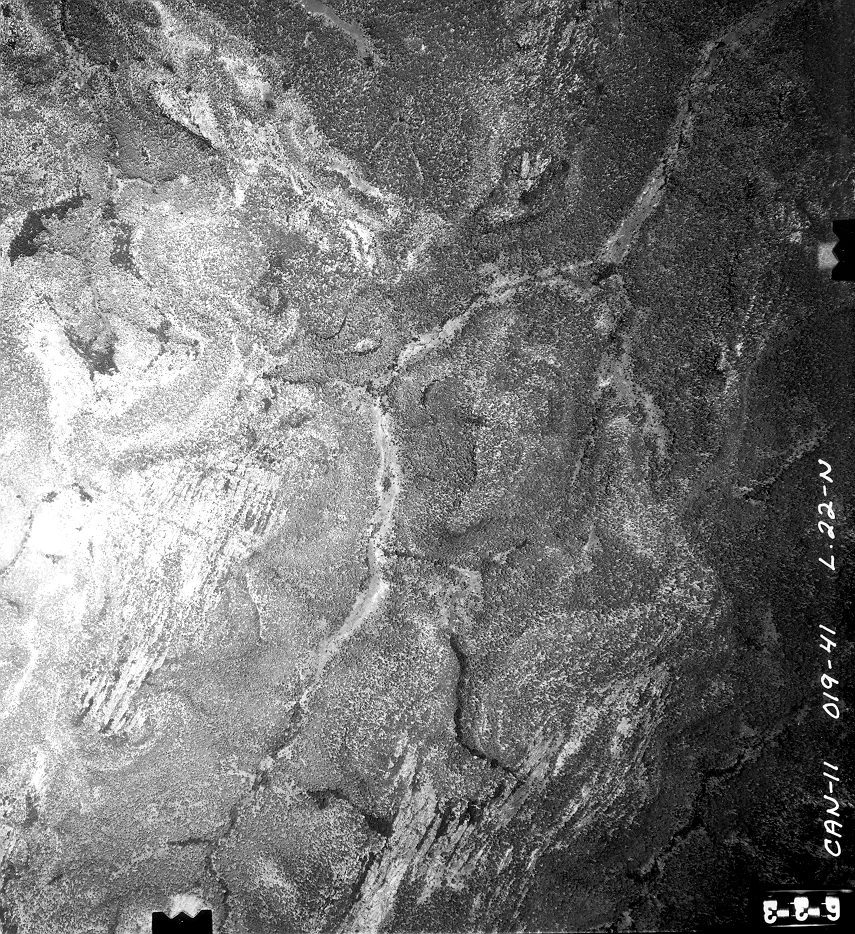
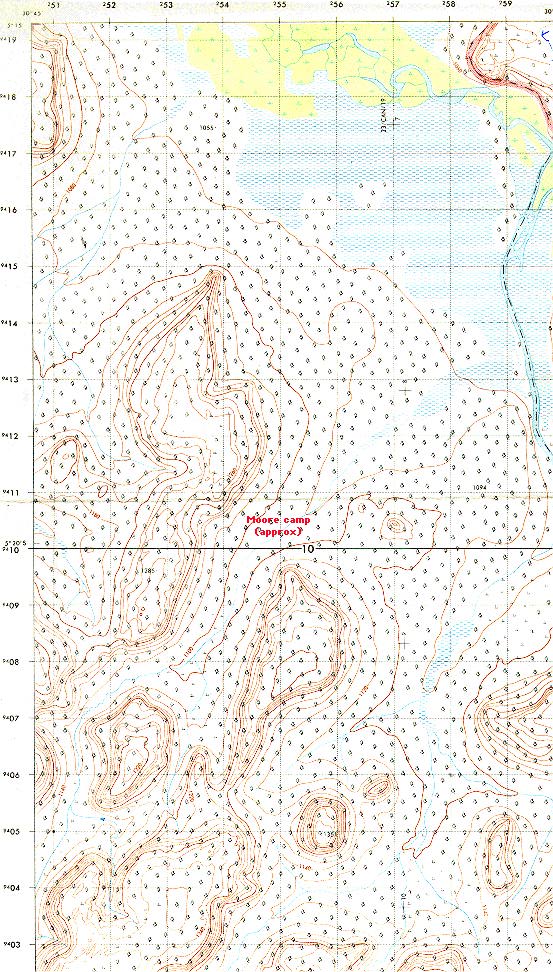
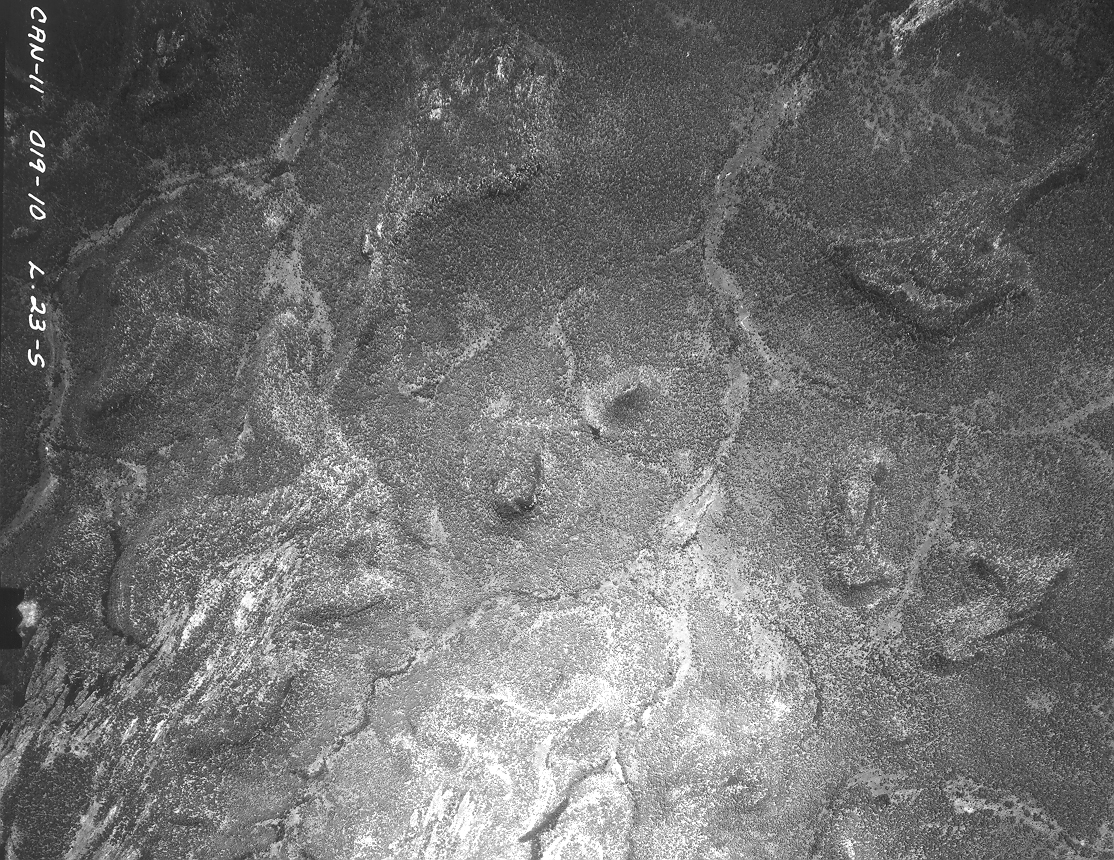
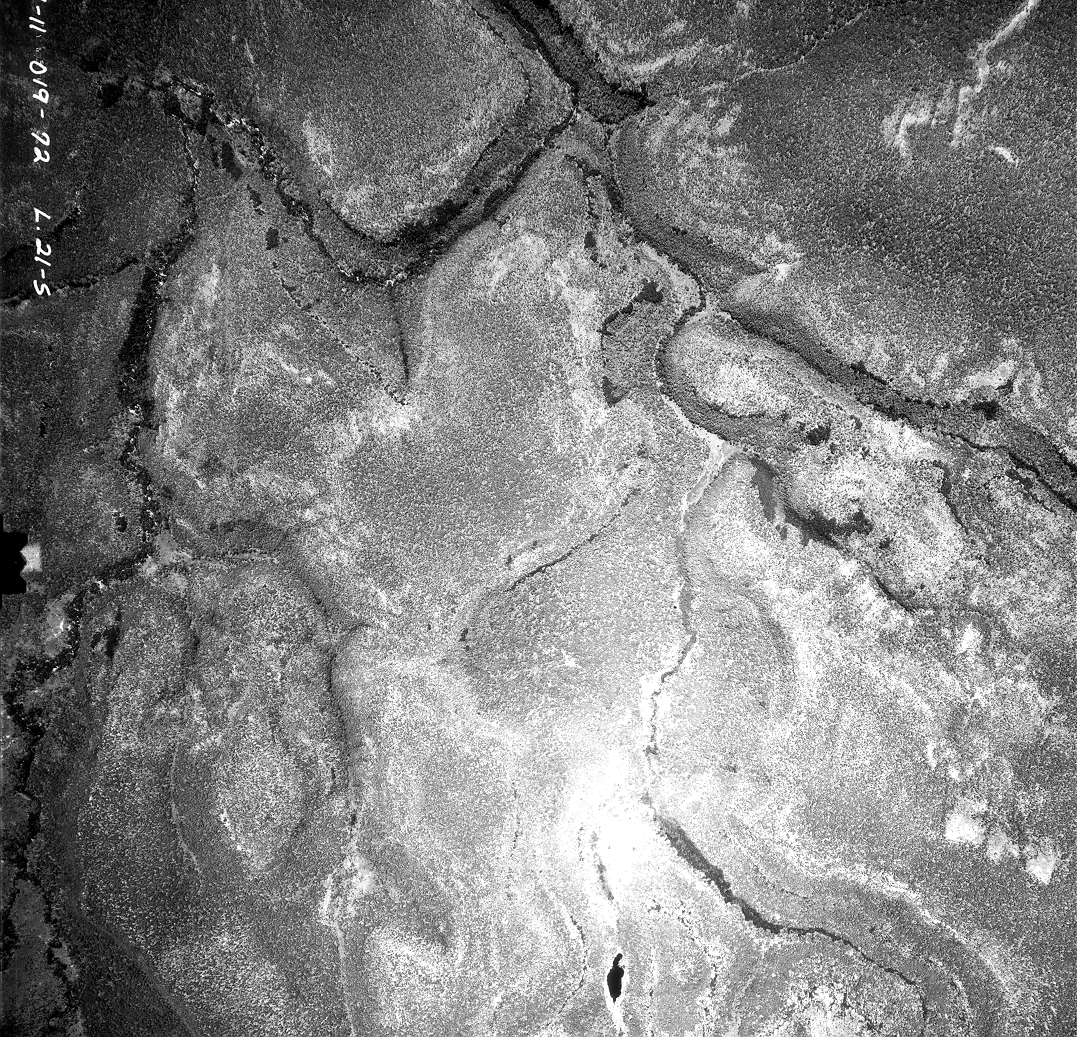
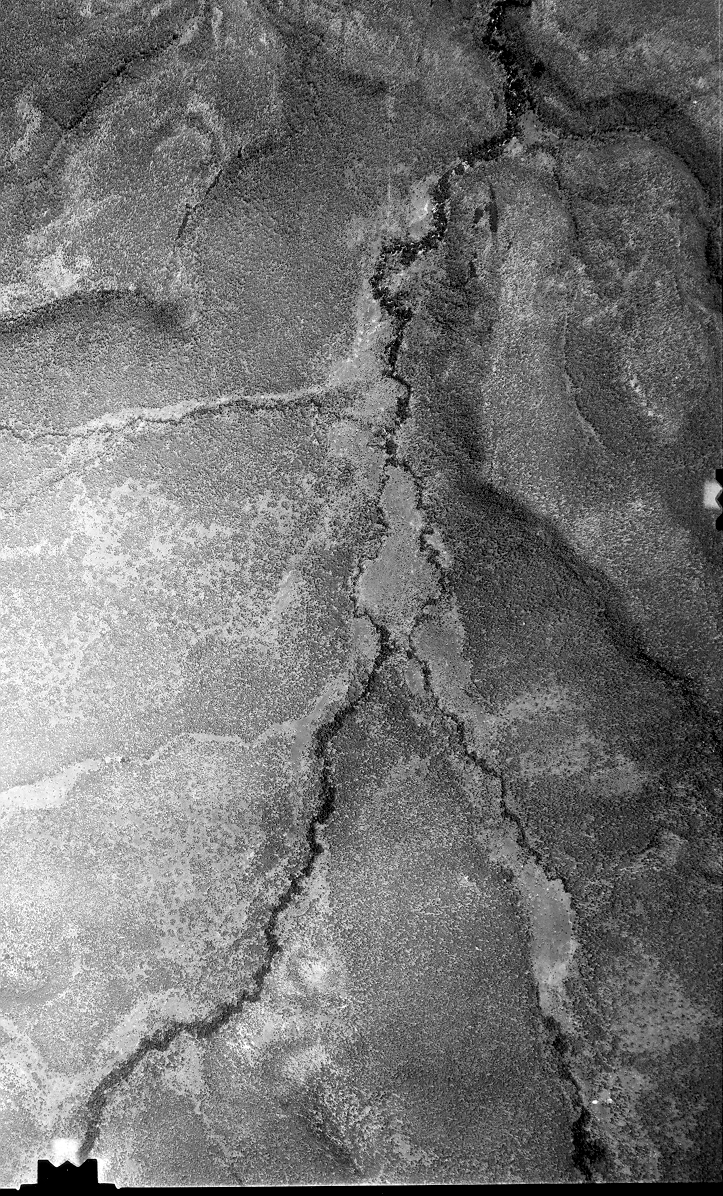
Misc. research areas ("CAN-11/..." etc is the photo ID; centerpoints are marked on the topo maps)
 |
 |
 |
| Ilumba region (689K) CAN-11/019-17 L23-S Corresponding topo map (1.4MB) |
Bulega region #1 (789K) CAN-11/019-41-L22-N Corresponding topo map (948K) |
Bulega region #2 (698K) CAN-11/019-10-L23-S [Red spot at corresponding location on each image] |
 |
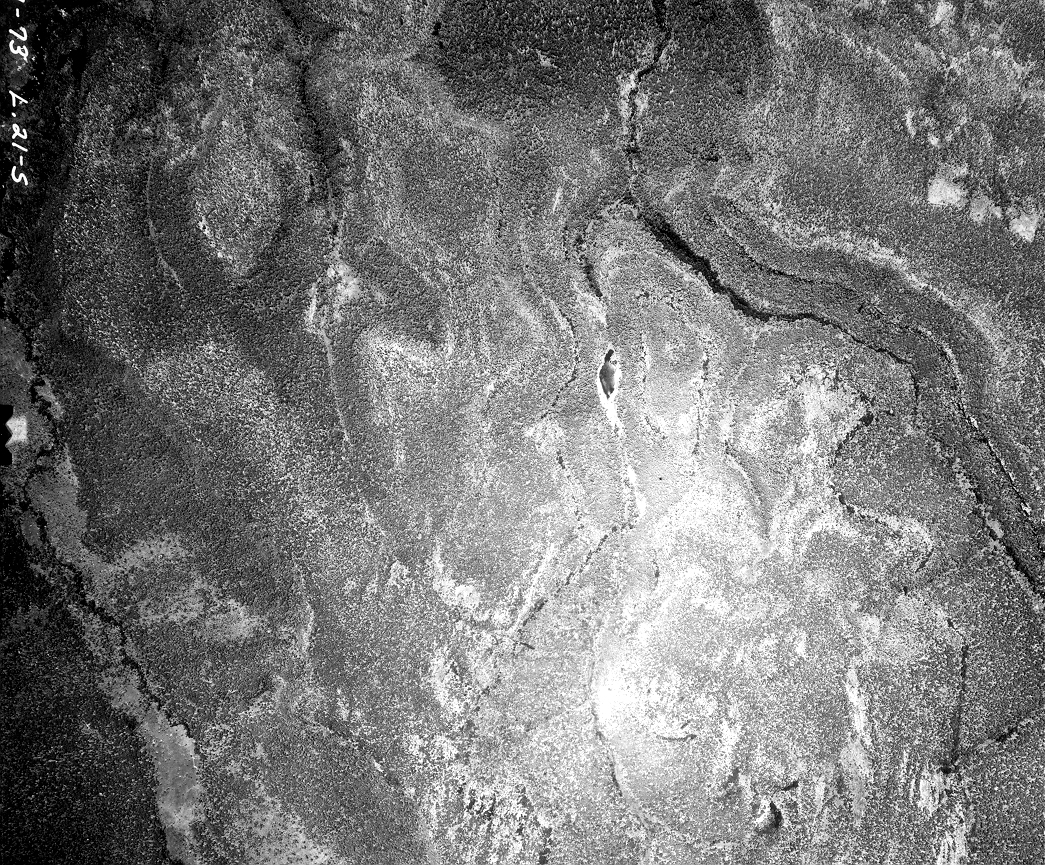
Mttindi #1 (995K) North end of the Mttindi research area. CAN-11/019-072 L21 Dark spot bottom center is "Samaki Lake" Corresponding topo map (1.7MB) | |
 |
 |
Left: Mttindi #2 (732K) Image includes Issa River (on left) and Mufombosi River (on right); they join at top CAN-11/026-225 L20 Right: Mttindi #3 (819K) |
 |
 |
Left: Mttindi #4 (626K) CAN-11/026-226 L20 I have found nests in the thick riverine strip along the Issa R Right: Mttindi #5 (890K) |
 |
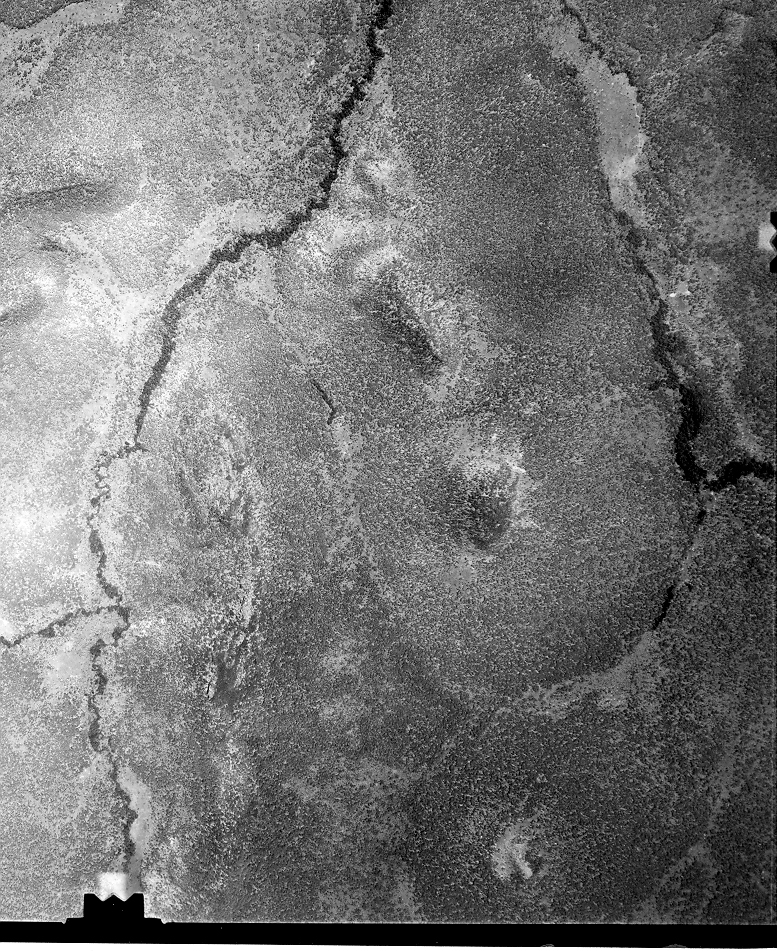
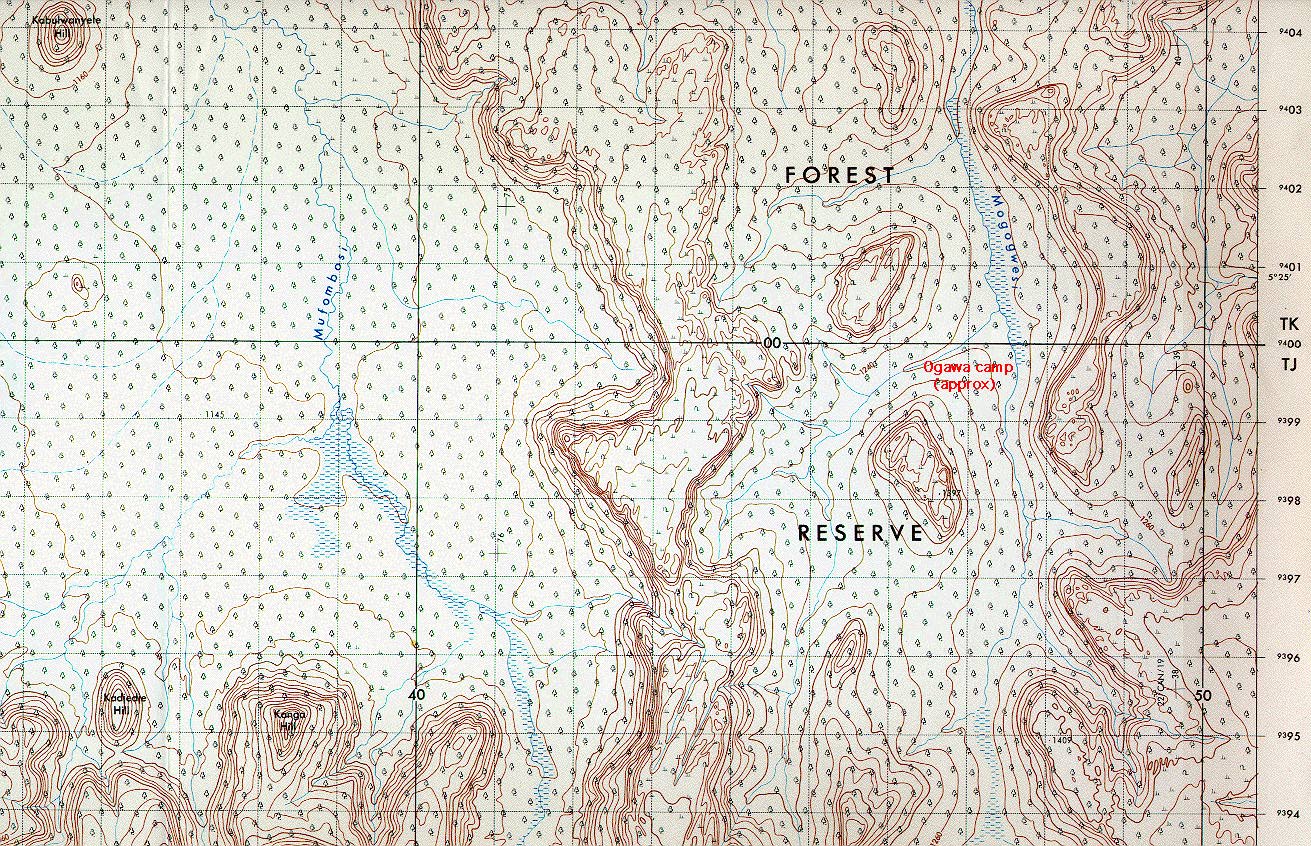
Right: Mttindi #6 (851K) CAN-11/019-075 L21 Riverine strip top right corner is the Mogogwesi R., Hideshi Ogawa's camp is below, on right edge of photo (remember edges are unavoidably distorted!) Corresponding topo map (1.7MB) |
 |
 |
 |
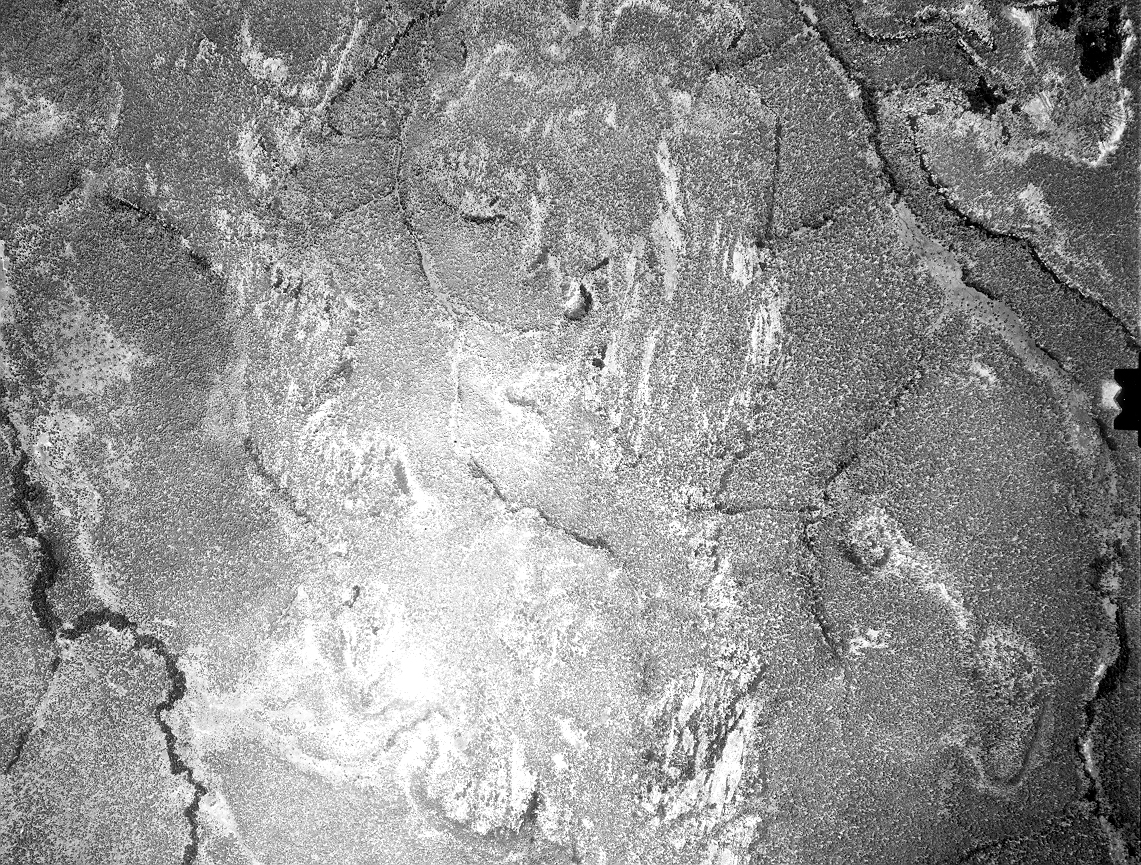
| Buyenze (W of main site) (615K) CAN-11/020-2 L17-S Corresponding topo map (1.8MB) |
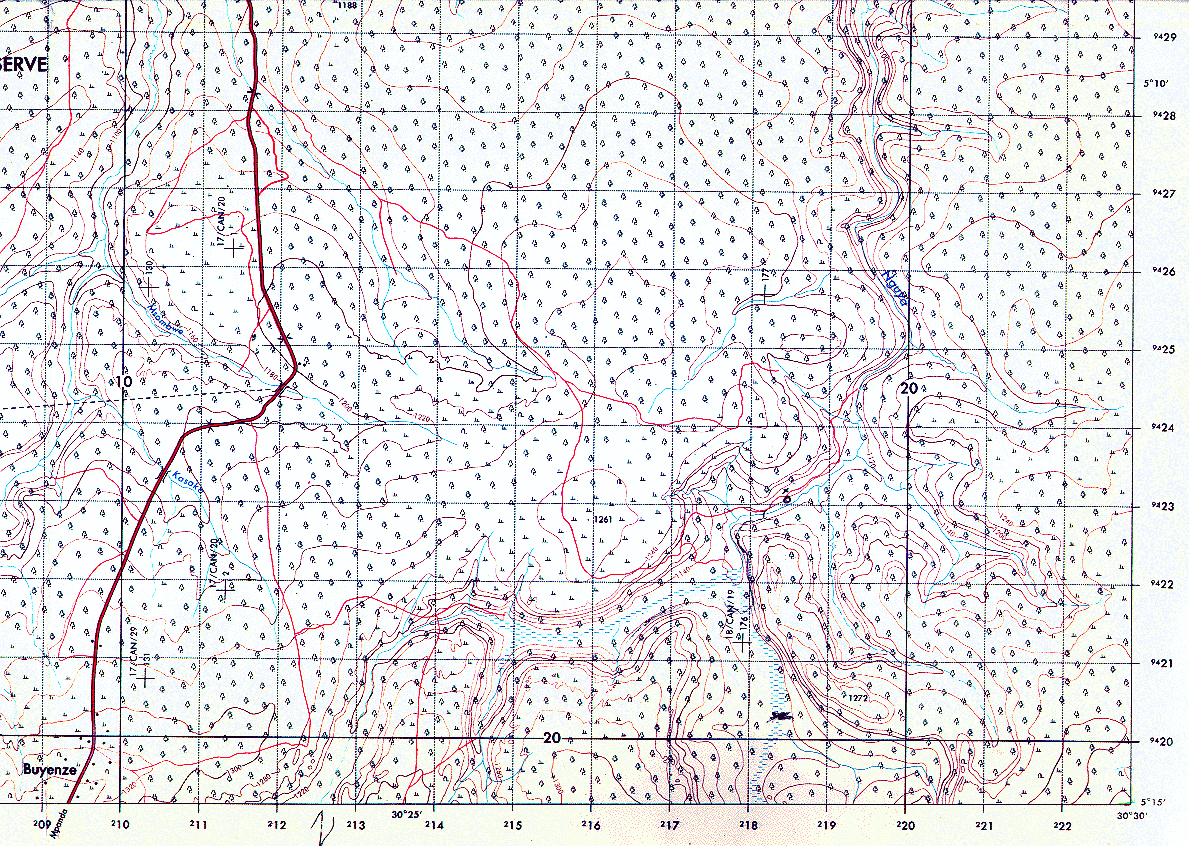
Nguya camp (534K) CAN-11/019-176-L18-N Corresponding topo map (1.8MB) |
Nguya detail (458K) CAN-11/019-176-L18-N |